8 Tips for After-season Planter Maintenance
The choices you make can affect your equipment value and the quality of next year's crop. Craig Greenwood, Birkey's Service Manager in Williamsport, shares his top 8 tips for after-season planter maintenance:
1. List problems that occur during the planting season
As you plant, note items that need repair or inspection, from electronic problems to ground-engaging tool issues. Keeping a notepad in the cab every year can help you remember to address problems quickly--before they become major issues.
As seedlings emerge, visit your fields and look for problems that could be corrected for next year, such as skips or doubles. For Precision Planting-related issues (such as row clutches), contact the Precision Farming Specialist at your local Birkey's.
2. Clean the planter, inside & out
Cleaning a planter at the end of the season is a smart choice
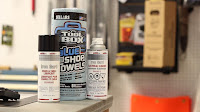
Use these supplies to clean your planter |
Typically, this means ridding the planter of dirt and leftover seeds. Craig says,
“Leaving seeds behind creates a rodent-infested mess come spring. Mice will find seeds, and they’ll do other damage while they’re crawling around looking for those lost kernels of corn.”
3. Winterize Fertilizer and Chemical Units
Craig explains why this is important:
“I see many folks who put their units away and think that next spring when they fire it up and put more fertilizer in the tank and go and it’s all going to work. Well, it doesn’t always work."
4. Remove and clean seed disks
The time to remove your seed disks and clean them out is directly after planting. You can bring them in to be checked for wear anytime before next year’s planting. They should be stored on dowel rod or stacked flat so they do not warp.
5. Remove and clean seed meters
Seed meters are a critical component of a planter. If your seed meter is not in good shape, you’ll see skips, doubles, or problems achieving your desired planting population. These problems will negatively impact your yields.
6. Remove and clean vacuum meters
When you take the disks out, clean the vacuum meter and remove all remaining seeds. Inspect the brushes and be sure they are in good form. If you bring these into your local Birkey's, we will disassemble, inspect, and run them on a Precision Planting and/or Kinze test stand.
7. Remove and clean finger pick-up meters
Get your finger pick-up meters clean and rotate them around multiple times to remove all seeds held in the seed belt. If you bring these into your local Birkey's, we will disassemble, inspect, and run them on a Precision Planting and/or Kinze test stand. Typical meters run at only 92%-97%; Birkey's will provide proof that they're running at 99%-101% range.
8. Schedule a Customized Maintenance Inspection (CMI)
When it comes to the inspection of a planter, producers already know what our team of Birkey’s technicians could say in a 5-minute video. For a thorough inspection, Birkey's recommends scheduling a customize maintenance inspection (CMI). What’s the difference between a CMI at Birkey’s and what producers could do in their shop? Here’s how Craig explained the process:
The summer months are a good time to schedule an on-farm inspection. Because of the long winter, farmers only had a few weeks to prepare their equipment this spring. Birkey's recommends making the repairs now, in the off-season, and enjoy the added benefit of parts and labor discounts. If producers put in the effort to prepare this summer, they'll be ready to go next spring.

